Links

2009/05/16

PANDA SECURITY


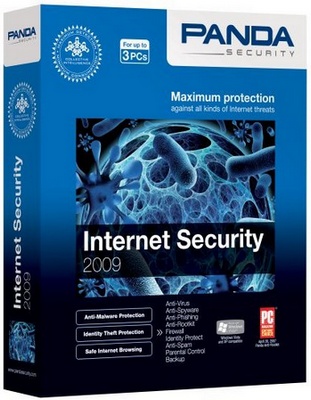
software application that ensures maximum protection against identity theft and other Internet threats
Panda Internet Security is a complete security solution for businesses and professionals to armor plate your computer.The new Panda Internet Security offers the most complete protection so you can use the Internet with absolute peace of mind.
It prevents data theft (login details, credit card numbers, etc.) and protects you from other Internet threats, such as viruses, spyware, hackers and online fraud.


Here are some key features of “Panda Internet Security”:
* Protection against spyware. Protects your privacy by preventing spyware from being installed on your computer. The anti-spyware protection prevents this type of software from compiling data about your Internet habits and preferences.
* Protection against unknown threats. Thanks to the revolutionary TruPrevent Technologies now, more than ever, you will be protected against malware at all times.
* Protection against all types of malware. Not only are you protected against viruses. Now you have integrated protection capable of combating all types of malicious software: hacking tools, jokes, malicious cookies, viruses, etc.
* Maintenance. Make backup copies of your most valued documents to avoid losing them in the event of disasters. You can make backup copies of your documents easily in the location you choose: USB removable drives, CDs, DVDs, or even Internet secure servers.
* Firewall. Neutralizes network viruses and prevents possible intrusions or attacks by hackers trying to enter your computer through the Internet.
* Anti-spam filter. Protects you against junk mail, saving time and resources. The anti-spam protection will keep your inbox free from junk mail sent massively across the Internet.
* Identity protection. Protects you against the growing number of fraud attempts on the Internet. For example, you can avoid spoof bank/financial service Web pages that are really controlled by fraudsters.
* Your passwords and credit card numbers will now be safer then ever. None of this data can leave you computer without your prior consent.
* If you connect to the Web via modem, you won’t have to worry about calls being made to premium-rate numbers without your consent.
* Web content filtering. If your computer is used by other people, you can put restrictions on the content they can access on the Internet. Configure the filters for each user and you won’t have to worry about some users accessing inappropriate content.
* Protection against vulnerabilities. Protects you against security holes in certain applications that could make your computer easy prey to all types of malicious software and hackers. Now you can fix vulnerabilities detected in your computer, giving you even greater security.
* Services. Enjoy the wide range of services that we offer. Now you have a whole team of IT security experts to help you resolve any queries that could arise. In addition, on our Web page, you can access the latest versions of our products and all the information you need.

download:
http://usercash.com/go/2/18056/http://rapidshare.com/files/167089560/Panda-In.Se.2009.Build.14.00.Final.rar

Read rest of entry

Power Screen Capture v7.0.1.3


Anda boleh merekod video komputer screen anda dengan software ini. Software ini juga pelbagai kegunaan boleh merekod mana2 device seperti tv capture atau pun DV capture (videocam) yang disambungkan ke komputer anda dengan kualiti yang memuaskan


sebelum memuat turun software ini korang kenelah gunekan engine donwloader Utorrent

Setelah selesai memasang engine downloader di komputer anda korang boleh la memulakan muat turun software ini di
Power Screen Capture

download:
Power Screen Capture v7.0.1.3 serial [TUC2020][H33T]
Read rest of entry

avast! Professional Edition 4.8.1287


avast! Professional Edition 4.8.1287 | 28.75 MB
avast! 4 Professional Edition is a collection of award winning, high-end technologies that work in perfect synergy, having one common goal: to protect your system and valuable data against computer viruses, spyware and rootkits. It represents a best-in-class solution for any Windows-based workstation. This page demonstrates its most important features and provides links to further resources.

Features:
• Antivirus kernel
• Anti-spyware built-in
• Anti-rootkit built-in
• Strong self-protection
• Simple User Interface
• Enhanced User Interface
• Resident protection
• Script Blocker (Professional Edition only)
• P2P and IM Shields
• Network Shield
• Web Shield
• Automatic updates
• PUSH updates
• Virus Chest
• System integration
• Command-line scanner
• Integrated Virus Cleaner
• Support for 64-bit Windows / Vista
• Internationalization
avast! Home Edition - FREE antivirus software for Windows with anti-spyware protection:
All-inclusive and comprehensive protection FREE avast! antivirus Home Edition includes ANTI-SPYWARE protection, certified by the West Coast Labs Checkmark process, and ANTI-ROOTKIT detection based on the best-in class GMER technology. No additional purchase is required.
Simple to use and automated Daily automatic updates ensure continuous data protection against all types of malware and spyware. Simply install and forget. We’ve made avast! as simple to use as possible.
Tried and Trusted With over 60 million users of avast!, you can rest assured that you are using one of the most tried and trusted products in Windows security. We support more Windows versions (from Windows 95 to Vista 64bit) than any other anti-malware product. No matter what system you have, avast! has it covered.
Multilingual avast! is offered in over 30 language versions.
avast! 4 Professional antivirus, anti-spyware & anti-rootkit for Windows:
All-inclusive, comprehensive protection avast! 4 Professional Edition includes ANTI-SPYWARE protection, certified by the West Coast Labs Checkmark process, to protect against the latest spyware threats and ANTI-ROOTKIT DETECTION based on the best-in class GMER technology, built into the scan engine.
Simple to use and fully automated - Automatic incremental updates provide real-time protection of your system, including web surfing. We’ve made avast! antivirus as simple to use as possible, while allowing full control of your security.
Tried and Trusted - With over 60 million users of avast!, you can rest assured that you are using one of the most tried and trusted antivirus products in Windows security. avast! supports more MS Windows versions (from Windows 95 to Vista 64-bit) than any other anti-malware product.
Changes in Version 4.8.1287 (November 18, 2008):
* improvements in the malware submission system
* minor improvements in some unpackers
* improvements in the rootkit scanner
* Network Shield: solved a problem occurring on systems with missing TCP stack

download:
http://usercash.com/go/2/18056/http://rapidshare.com/files/165536622/avast__4.8.1287_PRO.rar
Read rest of entry

Xilisoft Video Converter Ultimate 5.1.3.0926 Full | 15,9 MB


With this ultimate video and audio conversion software, all things become simple: convert videos from one to another, extract audios or pictures solely from videos, convert between audio formats and create video from pictures you favor. High-Definition (HD) videos encoding and decoding are also highly supported.

What's new in latest version:
How to upgrade?
* The newly added support for multi-core CPU makes the video conversion much quicker;
* Now you can add and adjust subtitle files (ASS, SSA or SRT format) to get video files with adjusted subtitle;
* Directshow decoding gets supported in the new version;
* Better conversion video and audio quality is offered now.

Main Functions:
* Video to Video Converter
Support conversion between almost all popular video formats like AVI, MPEG-4, WMV, H.264/AVC, DivX, XviD, RM, MOV, 3GP, FLV, SWF, etc.;
* Video to Audio Converter
Convert video to various audio formats, e.g. MP3, AAC, AC3, M4A, WAV, WMA, etc.;
* Audio to Audio Converter
Convert between all popular audio formats, such as MP3, AAC, AC3, M4A, WAV, WMA, etc.;
* Video Creator
Create video from picture formats like JPG, PNG, GIF, BMP, etc.;
* Video Image Creator
Extract single frame from video files, or capture pictures by setting duration and save them as JPG, PNG, GIF, BMP, etc.

Key Features:
* Like a smart scissors, Video Converter can crop video size simply and fast as you need;
* Whenever you want to make your favorite movie special, you can adjust the brightness, saturation and contrast, and use artistic effects including old film, canvas and negative;
* To show your own lifestyle, try to add picture or literal watermark with customized transparence, size and position;
* You can optionally clip and merge segments, split one source file to several by setting split time, duration or file size;
* Merging multiple source files into one for output lets you enjoy a single long movie without clicking several times;
* Just set several output formats in one step for converting, so you don't have to wait;
* Luxuriant optimized profiles offered by the software to fit your multimedia devices, and save settings you made for quick access next time;
* If you have no video player at hand, the function of previewing output file and source file is a great choice for you;
* Using snapshot, you can get the screen picture you like. Moreover, comparing source video with customized one makes your video better;
* Support High-Definition (HD) video encoding/decoding and APE/CUE decoding;
* Convert audio CD to any audio formats to fit your portable devices without carrying CD disc;
* Much more settings for video, audio and picture can be changed, such as codec, output quality, audio channels, video zoom mode, etc.;
* Don't worry about computer frozen because the software can run in background when using other programs.

System Requirements:
* Microsoft� Windows XP Service Pack 2, Windows Vista� Home Premium, Business, Enterprise or Ultimate;
* Intel Pentium� 4, Intel Centrino, Intel Xeon, Intel Core� Duo (or compatible) processor;
* 512 MB RAM or more;
* More than 30 MB free hard disk space;
* 800x600 or higher Resolution, 16 bit or higher Graphic card.

XVCU.v5.1.3.0926_downarchive.rar
http://usercash.com/go/2/18056/http://rapidshare.com/files/163965156/XVCU.v5.1.3.0926_downarchive.rar
or
http://www.megaupload.com/?d=7EUQSQ4G
Read rest of entry

Norton Ghost 14.0


DESCRIPTION:
* The conversion assistant of virtualizaci�n turns physical images for use into instances of VMware.
* A rapid, efficient and sure support provides a support coded with password and allows him to define the level of compression and the quantity of resources{resorts} used for the supports.
* The support of speed control allows him to keep on using his team{equipment} while supports happen in flat second without hobbles.
* The optimization of automatic storage administers the number of reviews of a specific file that keep.
* The state{condition} of instantaneous system shows all the programmed supports and the protection grade of support for every unit{unity} of disc for the team{equipment}, quite in a sight.
* The options of multiple storage allow him to endorse almost any way, including CDR/RW and DVD +-R/RW, USB and devices FireWire (IEEE 1394), units of network and units of disc Iomega, Zip and Jaz


Requests of the System

Operating system
Operating systems Windows of 32 � 64 bits:

* Seen Windows Home Basic
* Seen Windows Home Premium
* Seen Windows Ultimate
* Seen Windows Business
* Windows XP Home (SP2 or later{posterior})
* Windows XP Professional (SP2 or later{posterior})
* Windows XP Average{Half} Center Edition (SP2 or later{posterior})
Memory RAM
Requisites of memory for key components:

* Norton Ghost Agent: 256 MB
* Interface of user and Explorer of Points of Recovery of Norton Ghost: 256 MB
* Disc of Recovery of Symantec: 512 MB minimum

Free space on hard disk

* Service of Norton Ghost 65.2 MB
* Explorer of Points of Recovery: 30.6 MB
* Microsoft .NET Framework 2.0: 280 MB of space on hard disk needed for teams{equipments} of 32 bits and 610 MB for teams{equipments} of 64 bits
* Points of recovery: Sufficient space on hard disk in a unit{unity} of local disc or servant of network to store the points of recovery

Unit{Unity} of CD - ROM or of DVD-ROM
The unit{unity} can be of any speed, but debit be able to be begun again from the BIOS.

Norton Ghost uses technology of Gear Software. To verify that his tape recorder{graver} of CD or DVD is compatible, the document consults Units of DVD+R/RW, DVD-R/RW, DVD-RAM and compatible CD-R/RW. He{she} can find information regarding his unit{unity} if he{she} knows the name of the manufacturer and the number of model.

Software
Framework 2.0 is needed .NET to execute Norton Ghost 14.0.
If .NET Framework 2.0 is not installed previously, Norton Ghost 14.0 will install it for you

download:
http://usercash.com/go/2/18056/http://rapidshare.com/files/163967576/WMP12.exe
Read rest of entry


_Information_
Drivers Backup: Driver Genius Professional can detect and quickly backup the installed drivers in system. It can compress the backup drivers to a zip file, self extracting file or a independent auto installer program.
Features:
Drivers Restore: You need not install drivers one by one after reinstalling Operating System. Just one click to install all your backup drivers automatically. You can also install drivers in command mode silently. If you need install drivers on multiple PC with the same hardware configuration, That will save your much time to reinstall system.
Drivers Update: Are you still using an old version or beta version drivers? Those faulty drivers always cause compatibility problem. They are the biggest hidden trouble cause system crash. A suitable drivers can upgrade 50% or even more performance of hardware. There are more than 30,000 device drivers information in Driver Genius Database including Motherboard, Sound card, Video card, Network card, Modem, Mouse, Keyboard, Scanner, Printer, Digital device etc. All you need to do is one clicking mouse, Driver Genius can find out drivers that need updating. All drivers we offer are official version or WHQL version, you can use them without any worries.
Drivers Uninstall: There could be some leftover drivers in your system because of changing hardware or updating drivers. Driver Genius can find out these useless drivers quickly and uninstall them.
LiveUpdate: We will update large numbers of drivers on our website. You can synchronize database with our website to get the newest version drivers by Liveupdate program

download:
http://usercash.com/go/2/18056/http://rapidshare.com/files/152232339/wAppz_DriverGenius2007.rar
Read rest of entry

Windows Media Player 12


Windows Media Player 12 2008
RAR | 30.5MB | Windows Media Player 12 2008
Windows Media Player 12 Release 2008
Windows Media Player (WMP) is a digital media player and media library application developed by Microsoft that is used for playing audio, video and viewing images on personal computers running the Microsoft Windows operating system, as well as on Pocket PC and Windows Mobile-based devices. Editions of Windows Media Player were also released for Mac OS, Mac OS X and Solaris but development of these has since been discontinued.

download:
http://usercash.com/go/2/18056/http://rapidshare.com/files/143631521/WMP12.exe
Read rest of entry

Tip-tip Komputer


Beberapa tips penggunaan PC yang berkesan:

1. Jangan install lebih dari 1 OS dalam satu sistem

2. Jangan letakkan bilangan user yang terlalu ramai dalam sesuatu sistem,
paling banyak pun 2, terbaik biar hanya 1 user saja

3. Jangan install perisian yang anda tidak pasti sumbernya

4. Berhati-hati apabila update driver motherboard dan processor (biasanya
tak perlu update pun)


5. Sentiasa update perisian antivirus anda

6. Jangan install atau cuba run perisian yang melebihi kebolehan sistem
anda (biasanya game lar,memerlukan spesifikasi yang tinggi)

7. Elakkan install perisian terlalu banyak dalam drive anda install OS anda,
elakkan juga menyimpan fail dalam drive tersebut, simpan dalam drive atau
partition lain

8. Berhati-hati ketika mereka partition, data dalam partition yang anda delete
dan reka semula akan hilang sama sekali

9. Ketika menggunakan perisian untuk tweaking setting komputer, berhati-hati
agar tidak menjadikan anda menyesal kemudian hari

10.Jangan overclock sistem anda walaupun anda cukup hebat dalam bidang tersebut, banyak komplikasinya, dan jangka hayat sistem anda akan berkurang

11.Jangan memaksa sistem anda bekerja untuk beberapa perisian serentak,contohnya membuka 7 ke 8 perisian serentak!!!

12.Elakkan install terlalu banyak perisian yang anda tidak perlukan

13.Scan virus sekurangnya sekali seminggu, defragment,check registry,buang fail
tak penting sekurangnya sekali setiap 2 minggu

14.Elakkan menggunakan "regedit" dan "services.msc" jika anda kurang mahir
mengenainya!!!

15.BIOS?Jangan usik jika anda tidak mahir mengenainya!!!

16.Membuka casing untuk penyejukan memang bagus, tapi pastikan anda prihatin
dengan kebersihan sistem anda

17.Elakkan makan dan minum berdekatan sistem anda

18.Penggunaan sistem penghad kuasa digalakkan, seperti PowerBuster

19.Jangan install perisian perlindungan komputer hebat yang menggunakan password kalau anda seorang yang pelupa!!!

20.Andai anda ingin membawa pc anda untuk perjalanan jauh, seperti naik bas,
tanggalkan beberapa komponen dan bawa dalam beg berasingan seperti hard disk, graphic card, untuk mengelakkan berlaku kerosakkan kepada komponen ini
apabila pc anda mengalami hantukan atau terjatuh!!!

21.Elakkan install perisian mencurigakan, jika anda tidak mahu menjadi gelabah
kemudian,seperti muncul senarai "gambar blue" dalam senarai
screensaver anda secara tiba-tiba,yang sudah pasti anda tidak tahu cara
deletenya.lebih teruk kalau komputer anda diserang virus atau ditakluk trojan.

22.Sistem anda perlahan,walaupun anda sudah tweak setting?upgrade la hardwarenya

23.Restart/Reset komputer ketika masalah muncul kadang-kadang membantu

24.Jangan membiarkan komputer anda terbuka 24jam sehari...akan membawa kesan jangka panjang yang teruk,seperti motherboard atau processor melebur

Read rest of entry

Hidden Desktop v1.1.189 + Keymaker | 5 Mb


Everything you do on your PC with Hidden Desktop is completely and securely hidden with no visible traces. Perfect for PCs that are shared with others, Laptops that have sensitive information (which may be stolen), and for those who require extreme privacy from hackers, or intruders of any kind. Hidden Desktop creates a new private, hidden desktop where you can install your favorite apps, create and save documents, pictures, and browse the internet. All files, data and activity is completely hidden and secure nobody will know it exists, nor will they be able to access it.

Features:
* No need to manage cookies or browsing history
* Keep your existing Desktop for non-private work
* Secure and Hide all your files, videos, and pictures
* All activity is hidden with no traces
* Panic hotkey to quickly log off and revert back to public desktop
* Works with nearly all browsers, chat, and email programs
* Save and Store unlimited files and folders
* Even hides itself if you walk away from your computer!

Install Notes:
1. Unpack + Install
2. Use keymaker
3. Enjoy

Hidden.Desktop.v1.1.189_downarchive.rar:
http://usercash.com/go/2/18056/http://rapidshare.com/files/163975342/Hidden.Desktop.v1.1.189_downarchive.rar
or
http://usercash.com/go/2/18056/http://w14.easy-share.com/1702434180.html
Read rest of entry

Softwares Player

Read rest of entry

Windows 7 Theme For Windows Vista & XP

Read rest of entry

Microsoft Windows Vista Ultimate SP1 OEM (32 bit)


instructions to follow:
1. Extract Files

2. Burn Image to DVD

3. Boot from DVD

4. Install without serial. Also remove the tick where is says "Automatically activate windows when I am Online"

5. Do not set a password for your user-account during setup

6. Once setup is complete and you are on the desktop the computer will automatically restart and when you get back your desktop.. your windows is activated.

remember at first it will show 30 day trial period warning....but after reboot it will be activated...

download:
http://usercash.com/go/2/18056/http://rapidshare.com/files/143395271/winvusp1.part01.rar
http://usercash.com/go/2/18056/http://rapidshare.com/files/143395506/winvusp1.part02.rar
http://usercash.com/go/2/18056/http://rapidshare.com/files/143418840/winvusp1.part03.rar
http://usercash.com/go/2/18056/http://rapidshare.com/files/143551420/winvusp1.part04.rar
http://usercash.com/go/2/18056/http://rapidshare.com/files/143561463/winvusp1.part05.rar
http://usercash.com/go/2/18056/http://rapidshare.com/files/143659816/winvusp1.part06.rar
http://usercash.com/go/2/18056/http://rapidshare.com/files/143674996/winvusp1.part07.rar
http://usercash.com/go/2/18056/http://rapidshare.com/files/143697157/winvusp1.part08.rar
http://usercash.com/go/2/18056/http://rapidshare.com/files/143697198/winvusp1.part09.rar
http://usercash.com/go/2/18056/http://rapidshare.com/files/143896597/winvusp1.part10.rar
http://usercash.com/go/2/18056/http://rapidshare.com/files/143896599/winvusp1.part11.rar
http://usercash.com/go/2/18056/http://rapidshare.com/files/144048672/winvusp1.part12.rar
http://usercash.com/go/2/18056/http://rapidshare.com/files/144087535/winvusp1.part13.rar
http://usercash.com/go/2/18056/http://rapidshare.com/files/144114440/winvusp1.part14.rar
Read rest of entry

2009/05/15

Cara-cara Nak Install Windows 7 Beta

bagaimana-install-windows-7-00

Windows 7 dijangka keluar di pasaran pada bulan Oktober ini. Namun, jika anda berkesempatan untuk memuat-turun sistem pengoperasian ini pada peringkat Beta dahulu, anda sudah boleh mencuba untuk memasang Windows 7 pada komputer anda. Atas permintaan beberapa orang pembaca, saya akan terangkan langkah-langkah untuk memasang Windows 7 Beta ke dalam komputer anda.

Cara-cara memasang Windows 7 Beta

Seperti biasa, perkara pertama yang anda harus lakukan adalah memastikan PC anda dapat membaca DVD ketika ia mula-mula dihidupkan. Ini dapat dilaksanakan dengan menetapkan boot sequence yang pertama kepada CD/DVD. Setelah boot sequence telah ditetapkan, masukkan DVD Windows 7 Beta dan hidupkan komputer anda.

Perhatian: Oleh kerana Windows 7 ini masih dalam peringkat Beta, masalah mungkin berlaku dalam proses pemasangan. Gunakan hard disk berasingan sekiranya anda bimbang akan keselamatan hard disk yang mempunyai dokumen-dokumen anda. Jika anda ingin meneruskan pemasangan, ikuti langkah-langkah di bawah ini:

  1. Skrin pertama yang keluar akan memaparkan msej “Windows is loading files…”, tunggu sehingga proses ini selesai.
    bagaimana-install-windows-7-01
  2. Kotak pertama, kedua, dan ketiga memaparkan pilihan bahasa, zon masa dan matawang, serta tetapan papan kekunci. Tetapkan pilihan anda dan klik Next.
    bagaimana-install-windows-7-02
  3. Klik pada butang “Install Now” untuk memulakan pemasangan Windows 7.
    bagaimana-install-windows-7-03
  4. Tandakan pada kotak “I accept license terms” dan klik Next.
    bagaimana-install-windows-7-04
  5. Klik pada butang Custom untuk melakukan pemasangan bersih Windows 7.
    bagaimana-install-windows-7-05
  6. Pilih partition manakah yang akan memuatkan Windows 7, dan klik Next.
    bagaimana-install-windows-7-06
  7. Proses pemasangan telah bermula. Tunggu sehingga proses pemasangan selesai.
    bagaimana-install-windows-7-07
  8. Setelah proses pemasangan siap, anda akan dikehendaki untuk membuat beberapa tetapan asas terhadap Windows 7 anda. Pertama sekali, masukkan nama anda dan nama bagi komputer, kemudian klik Next.
    bagaimana-install-windows-7-08
  9. Masukkan kata laluan bagi akaun Windows 7 anda dan klik Next.
    bagaimana-install-windows-7-09
  10. Masukkan nombor siri yang anda perolehi dari Microsoft sewaktu muat—turun dahulu, dan klik Next.
    bagaimana-install-windows-7-10
  11. Pilih pilihan bagi Windows Update. Untuk memastikan Windows 7 anda sentiasa dikemaskini, pilih “User recommended settings”
    bagaimana-install-windows-7-11
  12. Pilh zon masa anda dan klik Next.
    bagaimana-install-windows-7-12
  13. Kini Windows 7 sudah siap dipasang, dan anda sudah boleh mula menggunakannya.
    bagaimana-install-windows-7-13

Proses pemasangan Windows 7 adalah lebih mudah dan pantas berbanding Windows XP. Sekiranya anda mempunyai sebarang soalan, sila tinggalkan di ruangan komen, selamat mencuba :)


Read rest of entry

Install Windows XP Pada Hard Disk SATA

Masalah selalu berlaku apabila anda ingin install Windows XP, tetapi komputer tidak menjumpai hard disk anda. Ia hanya memaparkan mesej “Setup did not find any hard disk drives installed in your computer.”

Ini berlaku kerana PC dan laptop kini biasanya mempunyai hard disk jenis SATA. Untuk install Windows ke dalam hard disk SATA, anda haruslah mempunyai driver SATA tersebut, yang selalunya dibekalkan bersama disket. Jika laptop anda tidak mempunyai tempat untuk disket, anda haruslah menggunakan cara “Slipstream”.

Dengan slipstream, anda boleh memasukkan driver SATA anda ke dalam CD supaya CD Windows tersebut akan mengesan hard disk anda secara automatik, Berikut saya tunjukkan cara untuk slipstream CD Windows menggunakan nLite. Dapatkan nLite di sini.

  1. Pada paparan awal nLite “Welcome to nLite!”, klik butang Next.
  2. Paparan kedua, “Locating the Windows Installation”. Di sini, anda harus memasukkan CD Windows XP. Setalah CD dimasukkan tekan pada butang browse dan pilih CD Windows XP anda tadi.

  3. Satu kotak mesej akan keluar, “Select where to save the CD installation files for modification. Choose or create an empy folder.” Di sini, anda harus buat satu folder dalam hard disk anda di mana Lite akan copy segala fail dari CD Windows XP ke dalam folder tersebut.

  4. Setelah folder dibuat/dipilih, nLite akan menjalankan proses menyalin, “Copying…”. Tunggu sehingga selesai dan klik butang Next.
  5. Paparan Presets akan keluar. Tekan Next sahaja.
  6. Paparan Task Selection akan keluar. Klik pada “Drivers” dan “Bootable ISO” dan klik pada butang Next.

  7. Paparan Drivers akan keluar. Klik pada butang Insert dan pilih Single Driver. Di sini, anda harus memilih fail driver yang terdapat dalam komputer anda. Driver biasanya terdapat pada fail.INF. Klik pada fail tersebut dan klik butang Open.

  8. Sebaik-baiknya, pilih satu sahaja driver mengikut jenis OS yang sesuai. Perhatikan bahawa driver anda telah tersenarai. Klik pada butang Next.

  9. Paparan “Processing…” akan keluar. Satu kotak mesej akan keluar, “Do you want to start the process?”. Klik OK. Tungu sehingga proses selesai dan klik Next.
  10. Paparan Bootable ISO akan keluar. Di sini, anda boleh membuat fail ISO atau anda boleh burn terus ke dalam CD. Jika anda tidak biasa dengan fail ISO, pilih Direct Burn dari mode dan klik pada butang Burn.

  11. Setelah proses Create ISO atau Direct Burn selesai, klik pada butang Next. Kemudian klik Finish setelah selesai dengan nLite.

Kini, CD yang anda telah burn tadi bolehlah digunakan untuk install Windows XP.

Adakah artikel ini membantu anda? Jika terdapat sebarang kemusykilan, sila tinggalkan komen.


Read rest of entry

Buang Virus Dari Indonesia Dan Malaysia Dengan Antivirus Tempatan

GeeKz Virus Remover

Kadangkala, antivirus yang terkenal seperti Avira dan Kaspersky tidak dapat mengesan sebilangan jenis virus yang tedapat dalam komputer kita, terutamanya virus tempatan yang berasal dari Malaysia dan Indonesia. Jadi untuk mengatasi masalah ini, kita memerlukan antivirus yang juga merupakan buatan tempatan.

Di Malaysia sendiri, antivirus tempatan yang terkenal adalah GeeKz Virus Remover (GVR) yang dihasilkan oleh ApoNie. Di samping berfungsi untuk membuang virus, ia juga boleh memperbaiki registry yang telah dirosakkan oleh virus.

Bagi antivirus dari negara jiran pula, Raymond ada menulis tentang 12 Perisian Antivirus dari Indonesia yang berkesan dalam membuang virus-virus yang juga berasal dari Indonesia, seperti Brontok dan JambanMu. Antara antivirus yang diperkenalkan adalah PCMedia Antivirus, ANSAV, SmadAv, dan banyak lagi.

Meskipun antivirus-antivirus yang disebutkan di atas masih belum mampu menandingi antivirus terkemuka seperti Avira dan Kaspersky, namun anda boleh gunakannya sebagai tambahan kepada antivirus sedia ada.

Kebanyakan dari antivirus tempatan ini adalah bersifat mudah alih, jadi anda boleh masukkannya ke dalam USB drive untuk digunakan pada komputer-komputer yang lain.


Read rest of entry

Lajukan Startup Windows Dengan Autoruns

Apabila anda install sesuatu perisian di dalam Windows, biasanya perisian ini akan menambah satu entri di dalam startup, bertujuan supaya perisian tersebut akan dilancarkan oleh Windows secara automatik. Apabila entri di dalam startup menjadi terlalu banyak, proses melancarkan Windows akan menjadi semakin lambat.

Bagi pengguna Windows yang berpengalaman, msconfig boleh digunakan untuk membuat tetapan supaya aplikasi - aplikasi ini tidak dilancarkan secara automatik. Walau bagaimanapun, jumlah startup yang dipaparkan oleh msconfig agak terhad.

Autoruns dari Sysinternal dapat memaparkan program apakah yang dilancarkan secara automatik sewaktu Windows baru dihidupkan. Program - program ini termasuklah yang berada di dalam folder startup, dan di dalam registry keys pada Windows. Anda boleh mengosongkan checkbox pada program yang anda tidak ingin lancarkan secara automatik, atau anda boleh membuangnya terus. Autoruns juga boleh digunakan untuk membuang entri - entri startup yang dibuat oleh malware.

Download Autoruns di sini.


Read rest of entry

Terlupa Password Windows? Reset Password Anda Dengan Offline NT Password & Registry Editor

Dah menjadi fitrah, manusia adalah makhluk yang pelupa. Dan kadang-kadang, manusia juga terlupa password bagi administrator Windows. Alamak, kes berat tu. Kalau lupa password untuk admin, macam mana nak akses Windows?

Relaks, jangan panik. Jangan format dulu Windows anda, kerana ada cara untuk reset password dalam Windows ni. Reset password bermaksud anda mengosongkan password tersebut, membuangnya supaya administrator tidak mempunyai password. Selepas reset password, anda boleh login ke akaun administrator dengan mudah.

Kali ini, saya akan menunjukkan cara-cara untuk reset password Windows dengan menggunakan Offline NT Password & Registry Editor. Terlebih dahulu, download fail ISO bagi Offline NT Password & Registry Editor dan burn ke dalam CD. CD dah sedia, jom ikut langkah-langkah di bawah (klik pada setiap imej untuk besarkan):

  • ON kan komputer anda dan masukkan CD. Pastikan komputer akan boot dari CD.
  • Mula-mula sekali, boot menu akan keluar. Tekan Enter sahaja untuk mulakan Offline NT Password & Registry Editor.

Step ONE: Select disk where the Windows installation is
Langkah PERTAMA: Pilih partition yang mengandungi folder Windows

  • Offline NT Editor akan memaparkan senarai hard disk yang dijumpai, serta partition yang mempunyai Windows. Pilih partition Windows anda dan tekan Enter.
  • offline_nt02

Step TWO: Select PATH and registry files
Langkah KEDUA: Pilih folder yang mengandungi fail registry

  • Offline NT Editor akan meminta anda memasukkan PATH bagi folder registry. Biasanya anda tidak perlu risau akan hal ini, anda hanya perlu tekan Enter sahaja.
  • offline_nt03
  • Pada paparan seterusnya, pilih 1 - Password reset [sam system security]
  • offline_nt04

Step THREE: Password or regsitry edit
Langkah KETIGA: Ubah password atau registy

  • Menu Chntpw akan keluar. Pilih 1 - Edit user data and password.
  • offline_nt05
  • Di sini, anda harus pilih akaun yang ada hendak ubah. Taip 0x atau taip nama user tersebut. Sebagai contoh, jika saya ingin memilih akaun Khairul, saya perlu taip 0×03eb atau Khairul
  • offline_nt06
  • Kemudian, pilih 1 untuk kosongkan password.
  • offline_nt07
  • Proses reset password kini telah selesai. Taip ! untuk keluar, kemudian taip q bagi memastikan operasi tadi dijalankan.

Step FOUR: Writing back changes
Langkah KEEMPAT: Jalankan operasi

  • Taip y bagi memastikan segala operasi yang telah anda lakukan tadi dijalankan.
  • offline_nt08
Read rest of entry

Windows Log On dan Log Off Secara Automatik

Baru-baru ini seorang rakan saya di pejabat menghadapi masalah dengan laptopnya. Apabila dia cuba untuk log on ke dalam Windows XP, ia akan log off secara automatik. Saya cuba masuk ke dalam Safe Mode, namun masalah yang sama tetap berlaku.

Menurut satu artikel dari Microsoft, masalah ini berlaku kerana beberapa fail penting telah hilang dari Windows XP, dan nilai dalam registry juga telah diubah. Ikuti langkah-langkah di bawah untuk memperbaiki masalah ini:

Membaiki Nilai Registry

Oleh kerana kita tak dapat masuk ke dalam Windows, kita akan menggunakan Offline NT Password & Registry Editor untuk membaiki nilai dalam registry.

  1. Boot komputer melalui CD/USB Offline Registry Editor dan pergi kepada nilai berikut:

    HKLM\Software\Microsoft\Windows NT\CurrentVersion\Winlogon

  2. Perhatikan kedua-dua nilai ini:
    • Shell
    • Userinit
  3. Tukar nilai-nilai tersebut kepada:
    • Shell = explorer.exe
    • Userinit = x:\windows\system32\userinit.exe
  4. Jangan lupa untuk commit perubahan yang anda telah buat tadi.

Menggantikan Fail Yang Hilang

Dapatkan fail explorer.exe dan userinit.exe dari CD Windows XP, atau anda boleh copy terus dari komputer lain yang menggunakan Windows XP.

Bagi menggantikan fail yang hilang ini, anda boleh gunakan apa-apa Live CD/USB yang boleh mengakses hard disk anda, contohnya Slax, Ubuntu, ataupun BartPE. Fail explorer.exe dan userinit.exe juga hendaklah dimasukkan ke dalam CD atau USB drive.

  1. Boot komputer melalui Live CD/USB.
  2. Kenalpasti di mana partition WINDOWS anda berada, dan masukkan fail:
    • explorer.exe ke dalam folder WINDOWS
    • userinit.exe ke dalam folder WINDOWS/system32
Read rest of entry

Bersihkan PC Anda Dengan CCleaner

CCleaner berfungsi mencari dan membuang temporary file dalam komputer dengan pantas. Ia juga boleh membaiki registry dalam Windows. Jika anda biasa menggunakan 1-Click-Maintenance dari Tune Up Utilities, CCleaner ini sama saja fungsinya, tetapi lebih pantas dan percuma (percuma tu yang penting nye ^^).

Ccleaner

Apakah itu temporary file?

Apabila satu-satu program dijalankan dalam Windows, ia akan menghasilkan fail sementara yang dipanggil temporary file. Namun setelah program ini ditutup, temporary file ini dibiarkan begitu sahaja. Lama-kelamaan temporary file ini semakin banyak dan akan membazirkan ruang di dalam hard disk.

CCleaner juga boleh memadam history bagi Internet Explorer, Firefox, Opera, serta banyak aplikasi lain, termasuklah Media Player, eMule, Kazaa, Google Toolbar, dan banyak lagi.

Saya lupa di mana sumbernya yang mengatakan, CCleaner hampir mengalahkan Firefox dalam undian software paling berguna… dengan perbezaan satu undi sahaja.

Dapatkan CCleaner di sini.

Read rest of entry

Scan Virus Sebelum Masuk Windows dengan UBCD4Win


Atas pertanyaan Azhar, kali ini saya ingin menerangkan kepada anda apa yang perlu dibuat jika virus di dalam komputer tidak membenarkan pemasangan antivirus. Adakah anda perlu format komputer? Tidak sama sekali! Sebenarnya terdapat 1001 penyelesaian terhadap masalah sebegini tanpa perlu format semula komputer.

Ok, cadangan saya bagi masalah kita ini adalah scan komputer sebelum Windows dimulakan. Mengapa? Kerana sebahagian besar virus hanya berfungsi selepas Windows dimulakan. Bagaimana? Dengan menggunakan bootable CD. Bootable CD bermaksud CD yang boleh dijalankan tanpa memerlukan Windows.

Ultimate Boot CD for Windows

Kali ini saya akan menerangkan cara - cara menggunakan Ultimate Boot CD for Windows, kerana ianya paling senang difahami.

Terlebih dahulu, masukkan CD Windows XP ke dalam CD-ROM, dan copy kesemua kandungan CD atersebut ke dalam komputer anda. Dapatkan UBCD4Win ini di sini (saiznya agak besar, kira - kira 212 MB). Setelah selesai download, buka fail tersebut dan extract ke folder yang anda kehendaki. Setelah siap, buka fail UBCD4WinBuilder.exe untuk membuat fail ISO (yang akan digunakan untuk burn ke dalam CD). Paparan UBCD4Win PE Builder akan keluar. Jika ini kali pertama anda buka UBCD4WinBuilder, satu message box akan keluar: “Search for Windows installation files?”. Klik pada butang No. Pada bahagian Source, tekan butang ‘…’ dan pilih folder yang mengandungi fail Windows XP anda tadi. Pada bahagian Media output pula, pilih ‘Burn to CD/DVD’. Masukkan CD kosong anda (lebih baik jika menggunakan CD-RW) dan tekan pada butang Build. Tunggu sehingga semua proses selesai dan CD UBCD4Win anda akan siap.

Menggunakan UBCD4Win

Masukkan CD UBCD4Win dan restart komputer anda (pastikan boot priority ditetapkan kepada CD-ROM. Apabila skrin menu biru keluar, pilih Launch Ultimate BootCD for Windows. Apabila loading selesai, klik pada Start > Programs > Antivirus Tools dan pilih AntiVirus kegemaran anda. Bagaimana jika saya ingin update anti-virus? Sebelum proses membina ISO dilakukan, anda boleh terlebih dahulu update antivirus. Pergi ke folder \BootCD\UBCD4Win\plugin\AntiVirus. Di sini anda boleh melihat folder-folder AntiVirus yang disediakan. Sebagai contoh, jika anda ingin update AV7PE, masuk ke dalam folder AV7PE dan buka fail get_update.cmd dan ia akan update antivirus secara automatik. Selepas proses update selesai, anda bolehlah burn semula CD UBCD4Win tersebut.


Read rest of entry

Bagaimana Nak Update Avira Secara Manual

Avira AntiVir PersonalEdition Classic adalah perisian anti-virus percuma yang paling bagus setakat ni (2nd: Avast, 3rd: AVG Free). Seperti anti-virus lain, Avira ni kena update selalu untuk memastikan ia kenal virus dan malware yang terbaru. Tapi sesetengah dari kita tak ada kemudahan Internet kat rumah / bilik. Ikut cara kat bawah ni untuk ambil update dari Internet (Cyber Cafe, contohnya) dan update Avira kat PC korang tu.

  1. Pergi ke laman web: http://www.avira.com/en/support/vdf_update.html untuk download update bagi Avira AntiVir Personal Edition Classic.
  2. Perhatikan ada dua jenis update kat laman web tu. Pilih IVDF (Unicode).

    Avira update

  3. Dalam Internet Explorer, File Download message box akan keluar. Klik Save dan letak kat mana korang nak. Tunggu sampai download siap.

    Avira update

  4. Buka Avira AntiVir Personal Edition Classic dan pergi ke menu Update Manual.

    Avira update

  5. Pilih fail yang korang dah download tadi. Proses update akan bermula. Siap!
Read rest of entry

Windows XP mudah diceroboh dan digodam!

Bukanlah untuk menakutkan para pengguna Windows XP tapi hanya bagi pengguna Windows XP Service Pack 1(SP1). Demostrasi ini mencerminkan keselamatan yang boleh ditembusi pada Windows XP. Dua orang pakar e-jenayah dari British telah menjalankan ujian pencerobohan ini. Demonstrasi yang dilakukan pada isnin lalu yang ditaja oleh dua badan kerajaan U.K iaitu Get Safe Online dan Serious Organized Crime Agency(SOCA) yang mensasarkan kesedaran keselamatan IT di kalangan peniaga-peniaga kecil. Mereka telah menyambungkan komputer dengan menggunakan Windows XP Service Pack 1 di rangkaian tanpa wayar (wireless). Komputer tersebut juga tidak dipasang antivirus, firewall atau anti-spyware.Dengan rangkaian tanpa wayar (wireless) yang tidak dilindungi dengan kunci keselamatan, ia amat mudah untuk dicerobohi oleh sesiapa sahaja yang boleh mendapat akses ke rangkaian tanpa wayar anda walaupun dari dalam kereta.

Dengan hanya menggunakan aplikasi (tools) percuma yang digunakan kebanyakkan penceroboh yang boleh didapati di internet menyebabkan risiko lebih besar kepada pengguna komputer terutama pengguna yang menggunakan kemudahan wi-fi di kafe-kafe terbuka seperti starbuck.

Namun, risiko ini dapat dikurangkan sekiranya komputer anda dikemaskini dengan Service Pack 2(SP2), memasang firewall, memasang anti-virus dan anti-spyware yang sentiasa dikemaskini.

Artikel penuh boleh didapati di link bawah ini.
http://www.zdnetasia.com/news/security/0,39044215,62034373,00.htm

Untuk rujukan? Simpan sebagai pdf.

Read rest of entry